How to set up IP address manually for a Windows instance?
To attach Reserved IP address, follow these steps on your Windows instance:
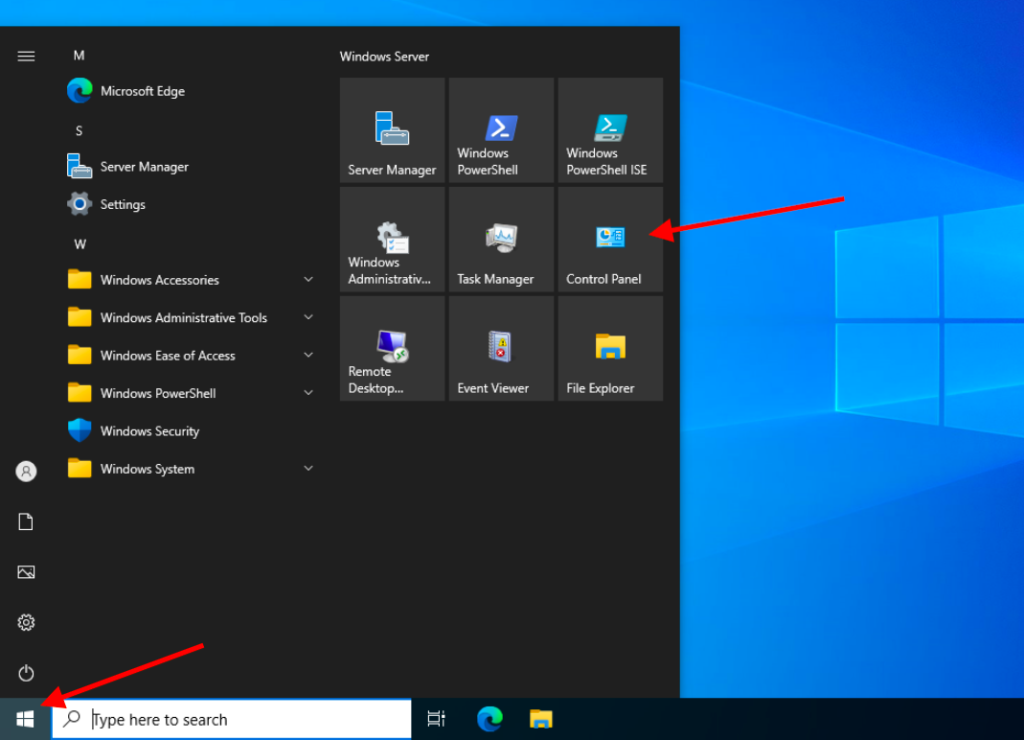
1. From the Start menu, click on the menu item “Control Panel”.
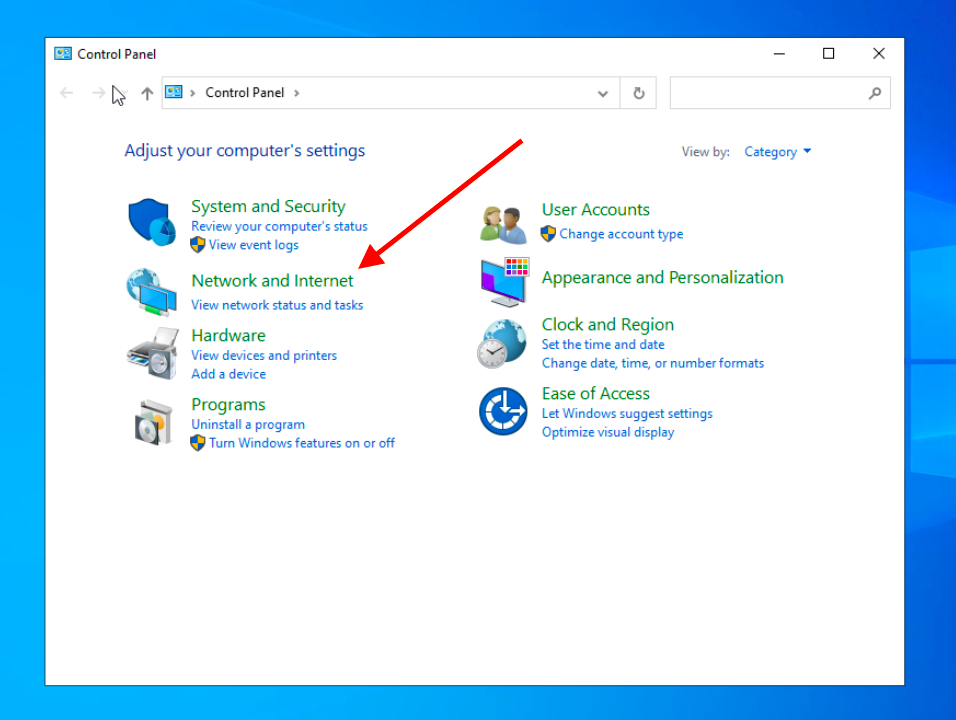
2. Navigate to Network Settings: click on “Network and Internet”.
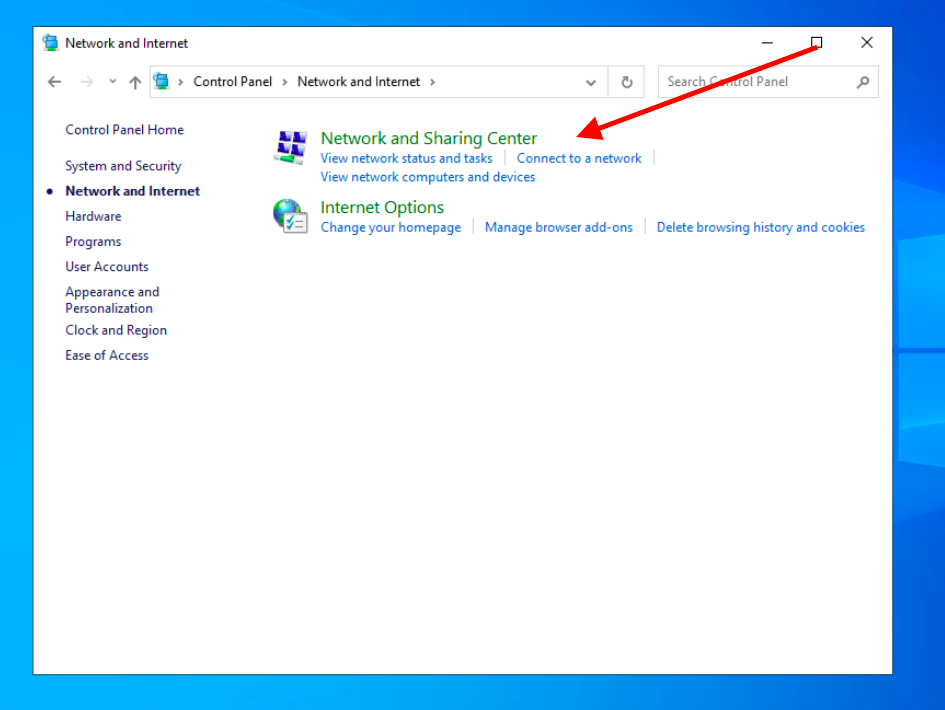
3. Select “Network and Sharing Center”.
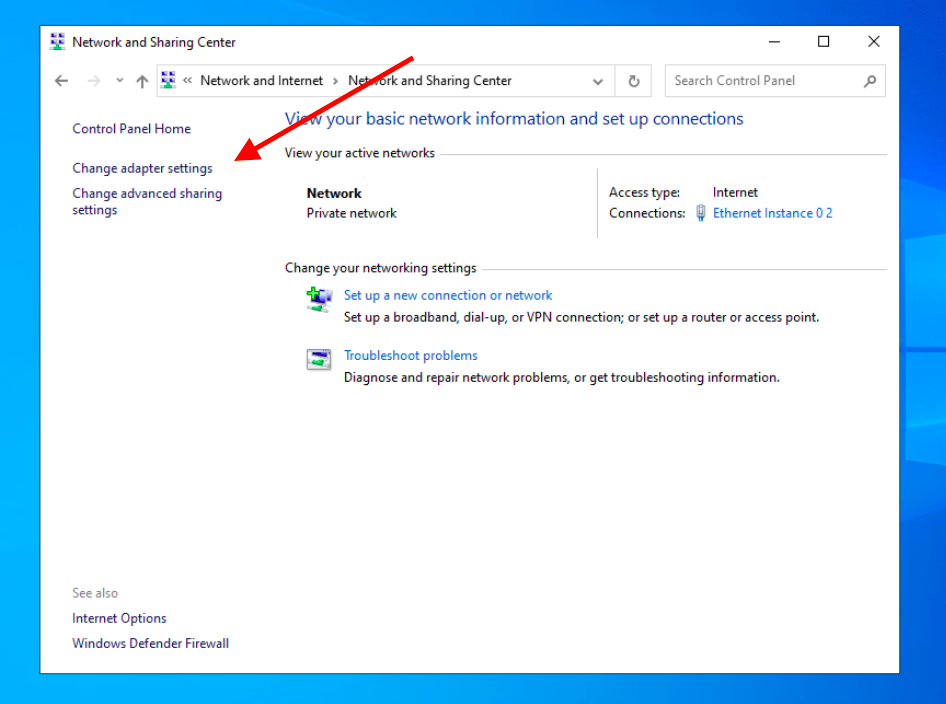
4. Click on “Change adapter settings”.
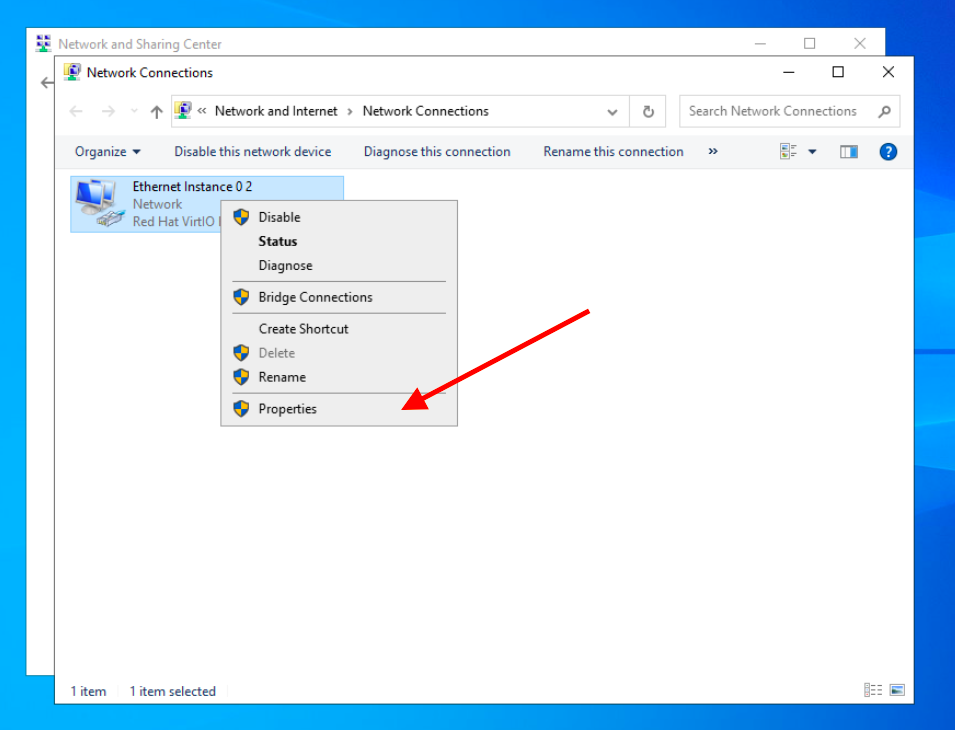
5. Right-click on the appropriate icon and select “Properties”.
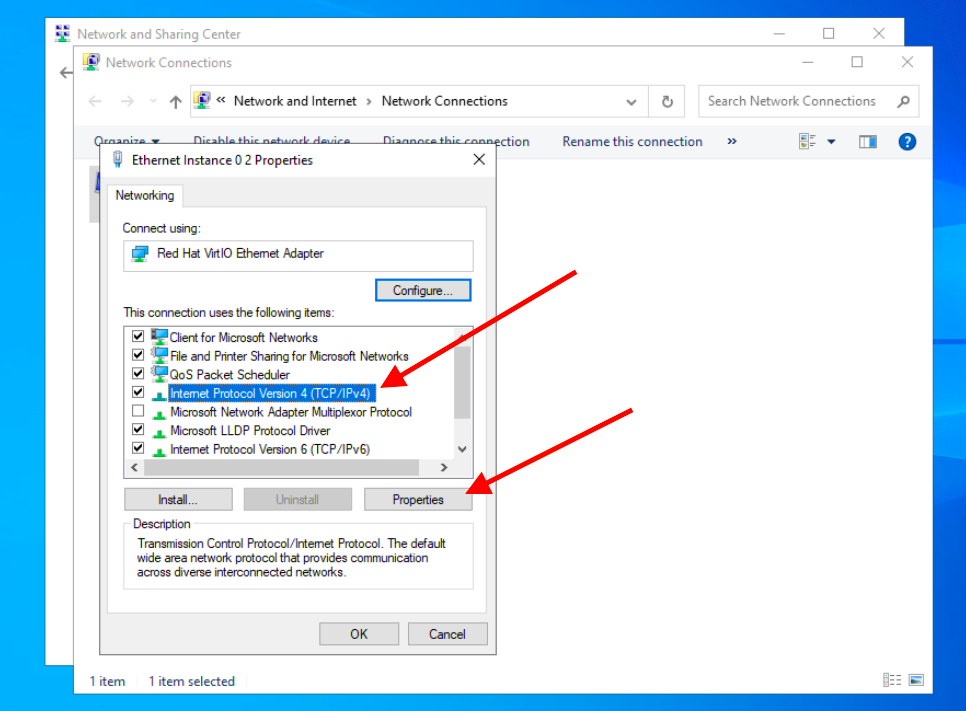
6. Choose “Internet Protocol Version 4 (TCP/IPv4)” and click on “Properties”.
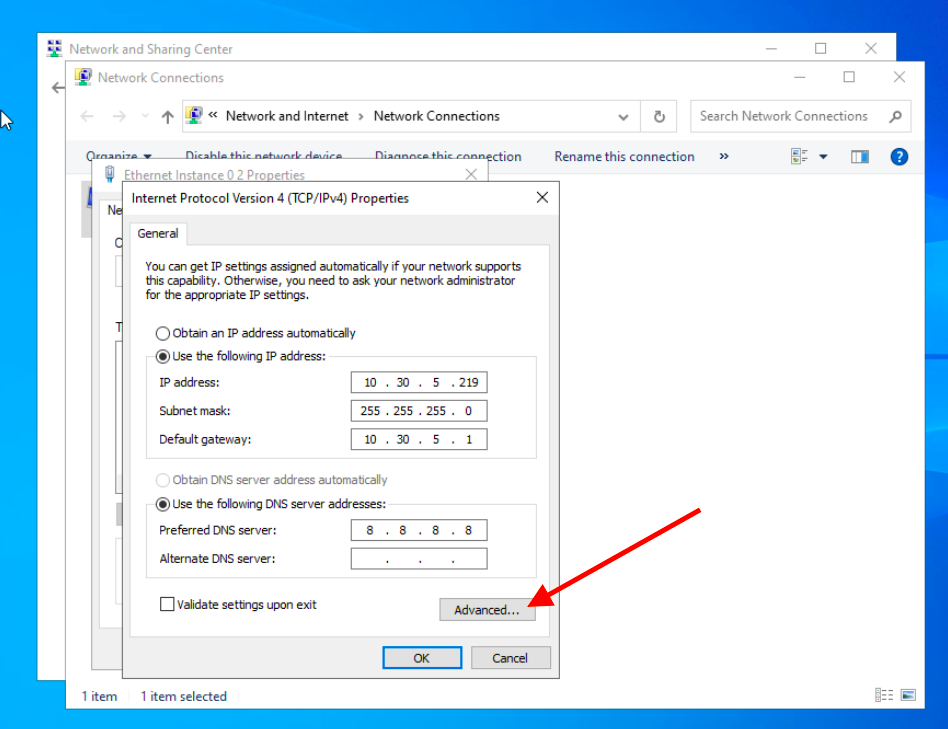
7. Click the “Advanced” button in the following window.
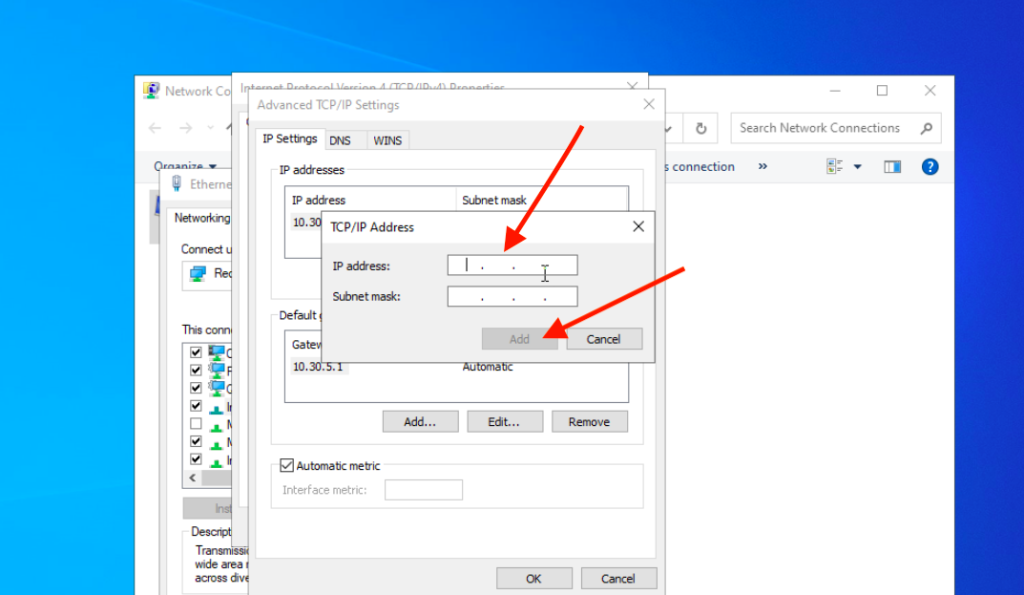
8. Press “Add” to adjust TCP/IP Address Settings .
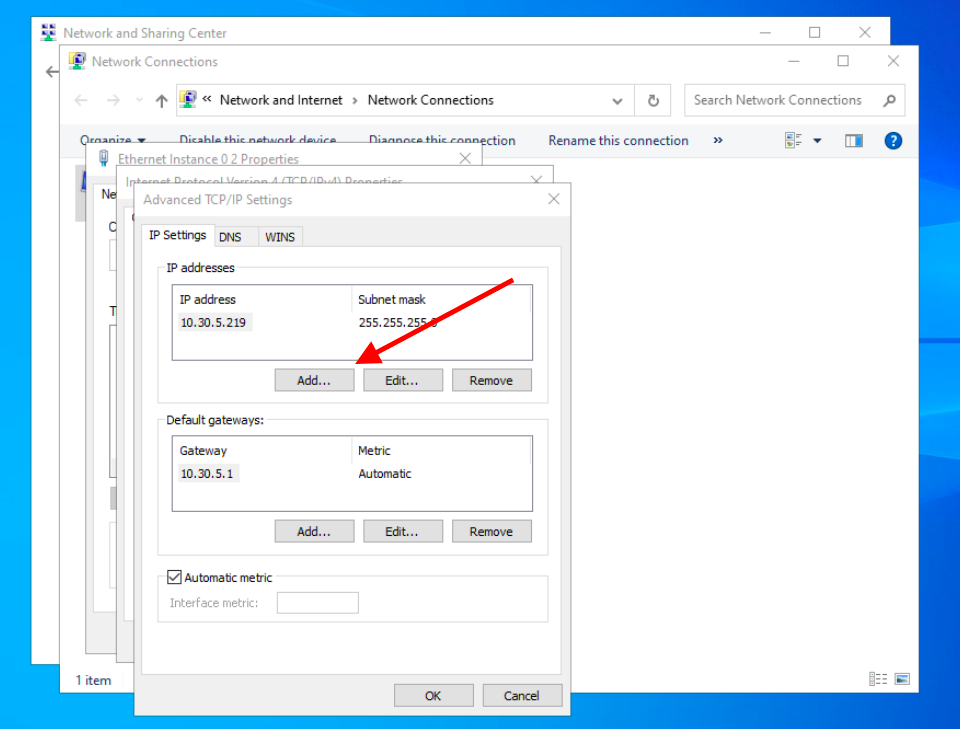
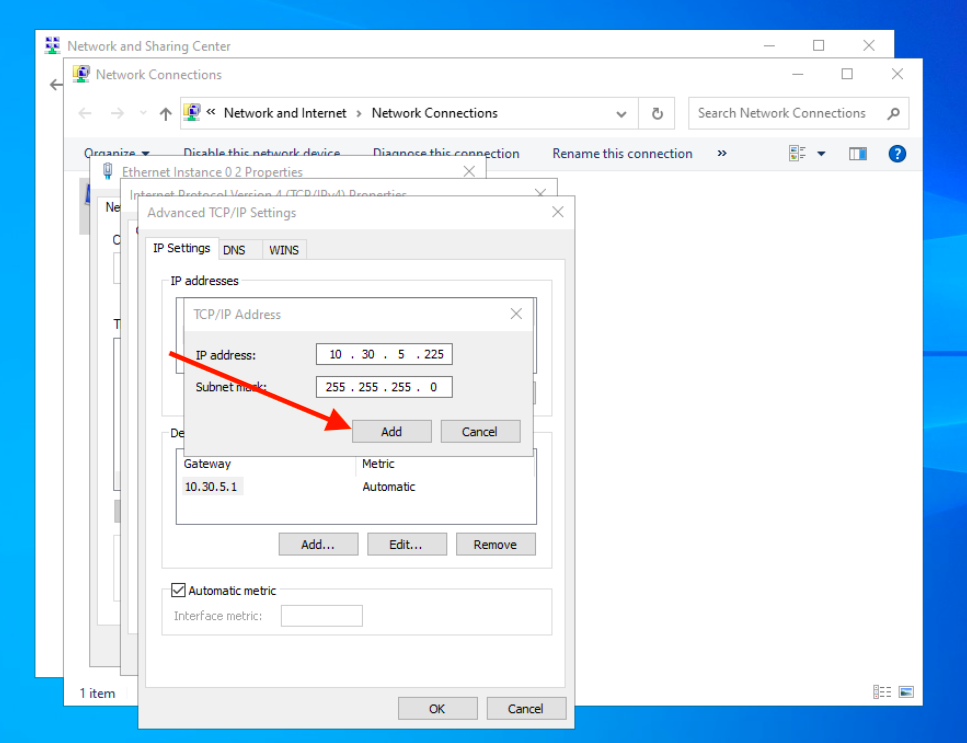
9. Enter second reserved TCP/IP Address.
10. Press “Add”.
11. Press “Ok” on all opened windows to remember your settings.
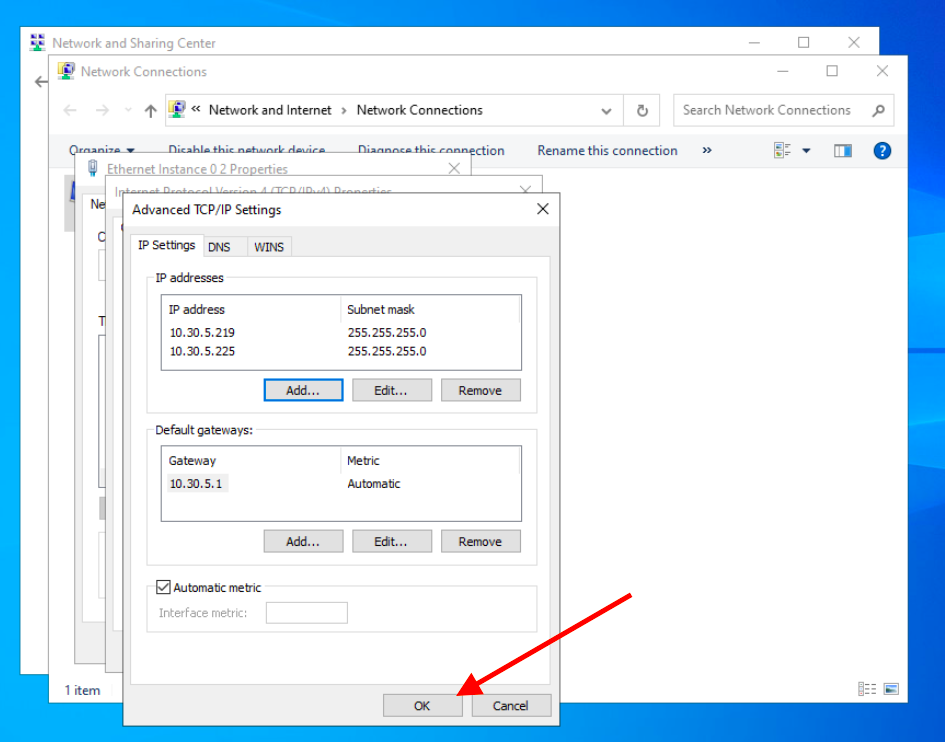
Ready. The Reserved IP address is now configured manually.
אחסון VPS – אחסון אתרים VPS
כאשר אתם מתכננים להקים אתר אינטרנט או לשדרג את האחסון הקיים שלכם, אחסון VPS (Virtual Private Server) מהווה אפשרות מצוינת שכדאי לשקול. אחסון אתרים […]
טיוטה אוטומטית
How can I increase my limits?
There are two options to increase your limits: Request a limit increase through customer support: If you need to increase your limits, you can contact […]


