Managing Reserved IP Addresses
Overview
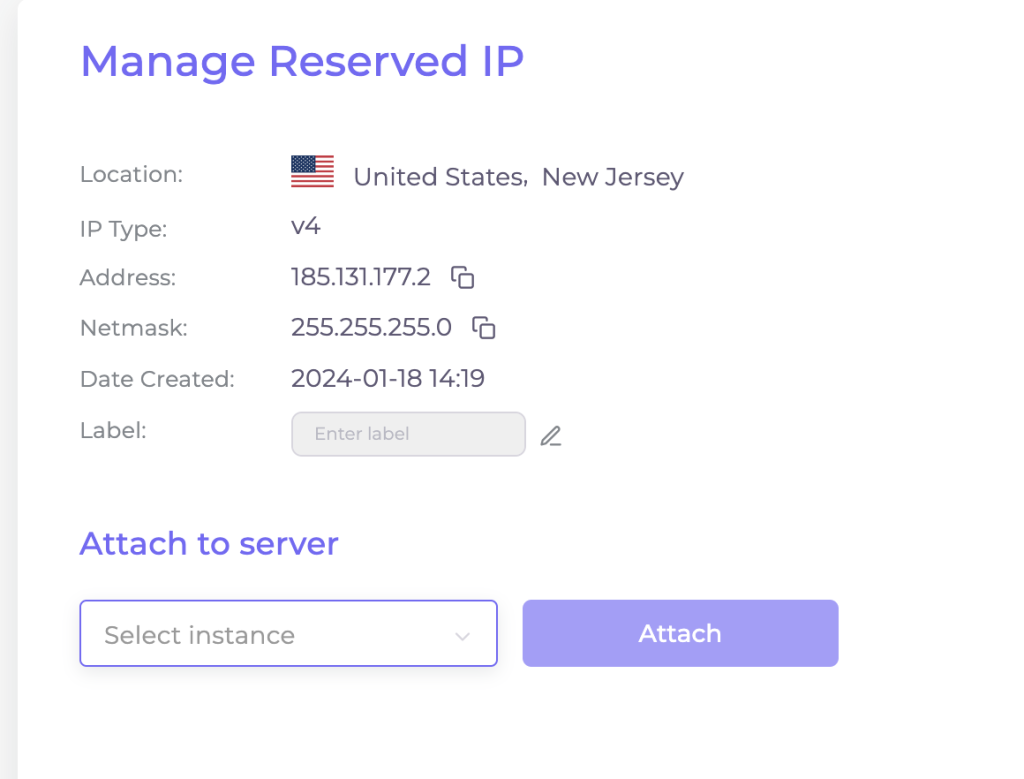
Reserved IP addresses are dedicated IPs that can be assigned to virtual machines (VMs) within our cloud service. This feature is useful for maintaining a consistent IP address for services hosted on VMs.
Note: Only 2 IP addresses can be assigned to a single VM.
Accessing Reserved IPs
- Click on the Network tab.
- Select Reserved IPs from the menu on the left.
- If no Reserved IP is available, you’ll be prompted with “You have no Reserved IP”.
- Click “Add reserved IP” to proceed.
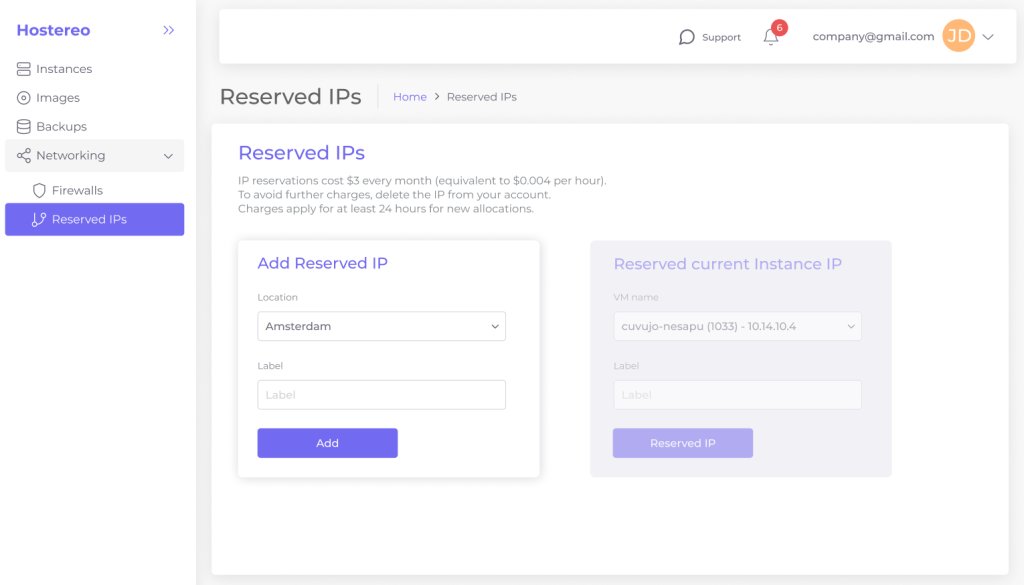
Adding a New Reserved IP:
To reserve an IP, you need to choose a specific location and provide a Label for it. The IP address you get will be allocated from a range of IP addresses available in your selected location.

- Remember, reserved IPs can’t be transferred between locations.
- Each reserved IP can be linked to only one machine at a time.
- Click the Add button to finalize your reservation.
Reserved current Instance IP:
The dropdown menu and Reserved IP button let you reserve IP addresses. The IP will continue being the main IP for the instance and no restart is needed.
Use the “Reserved current Instance IP” block.

- The IP ownership limit remains at 10 per location.
- Exceeding the limit prompts a message to contact support.
Attach a Reserved IP to an Instance
To assign a reserved IP to a running instance:
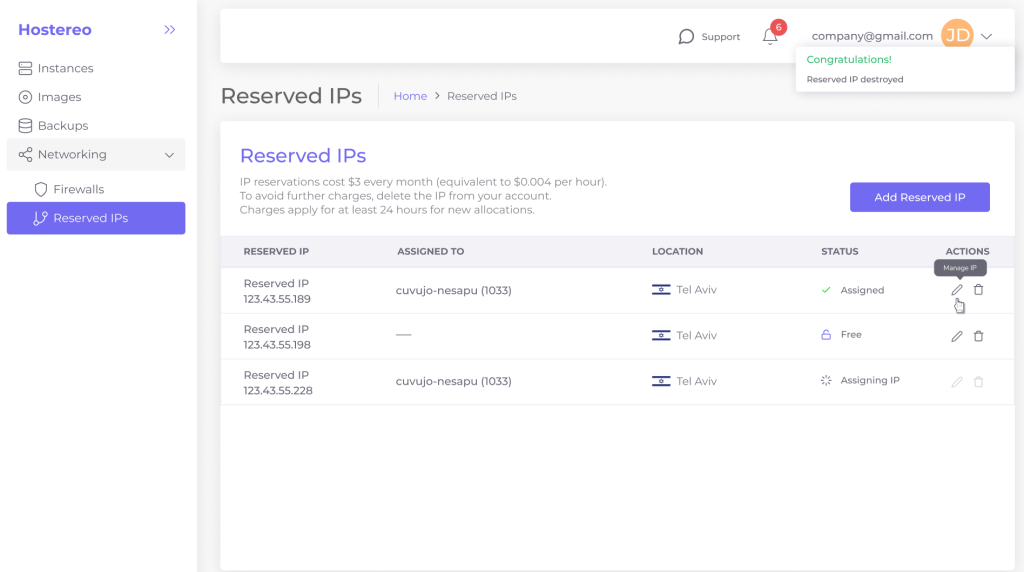
- Navigate to the Reserved IPs tab.

2. Select the pencil icon on the right to access the Manage Reserved IP page.
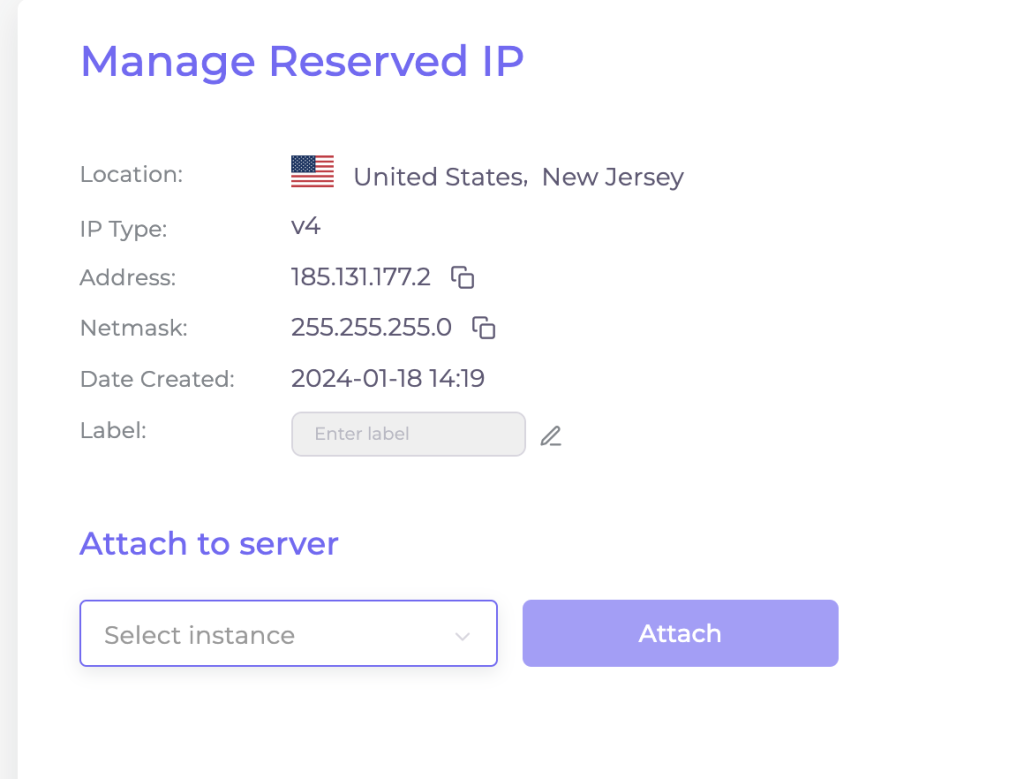
3. Choose a server from the dropdown menu and then press the “Attach” button.
Detach a Reserved IP to an Instance
If the reserved IP is the secondary address, you can detach the IP without destroying the instance.
- Go to the Reserved IPs tab.
- Access the Manage Reserved IP interface by selecting the pencil icon.
- Click the “Detach” button.
- If it’s the primary address, you must destroy the instance (ensure backups are made first).
- If it’s a secondary address, it can be detached without destroying the instance.

Delete a Reserved IP
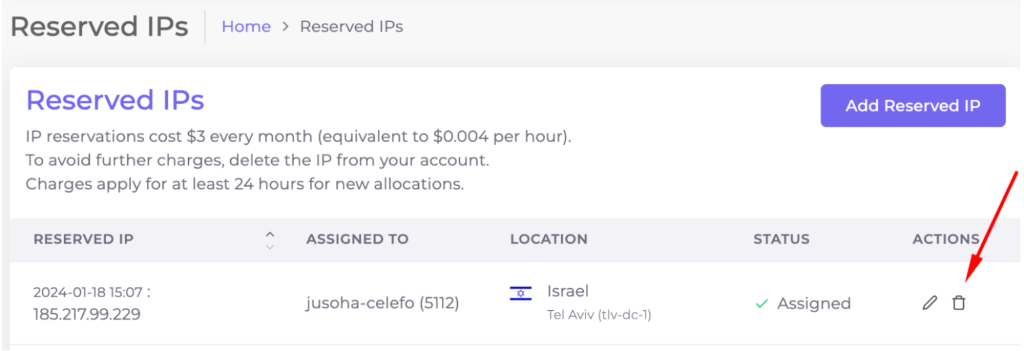
To stop charges and remove the reservation, delete the reserved IP.
- Note the consequences based on whether the IP is attached or unattached.
- To delete, go to the Reserved IPs tab, click the trash icon next to the IP, and confirm deletion.
Follow this article to set up secondary IP Adress to your Windows machine:
How to set up IP address manually for a Windows instance?
Reserved IP Billing Policy
When managing reserved IP addresses for your virtual machines (VMs), the following billing considerations apply:
First Reserved IP: If you reserve two IP addresses for a single VM, the first reserved IP is provided at no additional cost. This complimentary policy applies regardless of whether this reserved IP is actively assigned to a VM or kept on standby.
Second and Subsequent Reserved IPs: The second and any additional reserved IPs for a single VM are billed at the standard rate of $3 per month or $0.004 per hour. This charge is applied only when the reserved IP is actively assigned to a VM.
Replacing Default IP with a Reserved IP: Upon assigning a reserved IP to a VM, replacing its original default IP, the billing for the default IP ceases. This is because the VM continues to utilize a single IP from the address pool, ensuring you are not billed twice for the same service.
Multiple Unassigned Reserved IPs: If you have reserved multiple IPs but have not attached any to a VM, you are responsible for the payment of each unassigned reserved IP. This ensures that the IPs are held for your exclusive use and cannot be allocated to other customers.
אחסון VPS – אחסון אתרים VPS
כאשר אתם מתכננים להקים אתר אינטרנט או לשדרג את האחסון הקיים שלכם, אחסון VPS (Virtual Private Server) מהווה אפשרות מצוינת שכדאי לשקול. אחסון אתרים […]
טיוטה אוטומטית
How can I increase my limits?
There are two options to increase your limits: Request a limit increase through customer support: If you need to increase your limits, you can contact […]


